
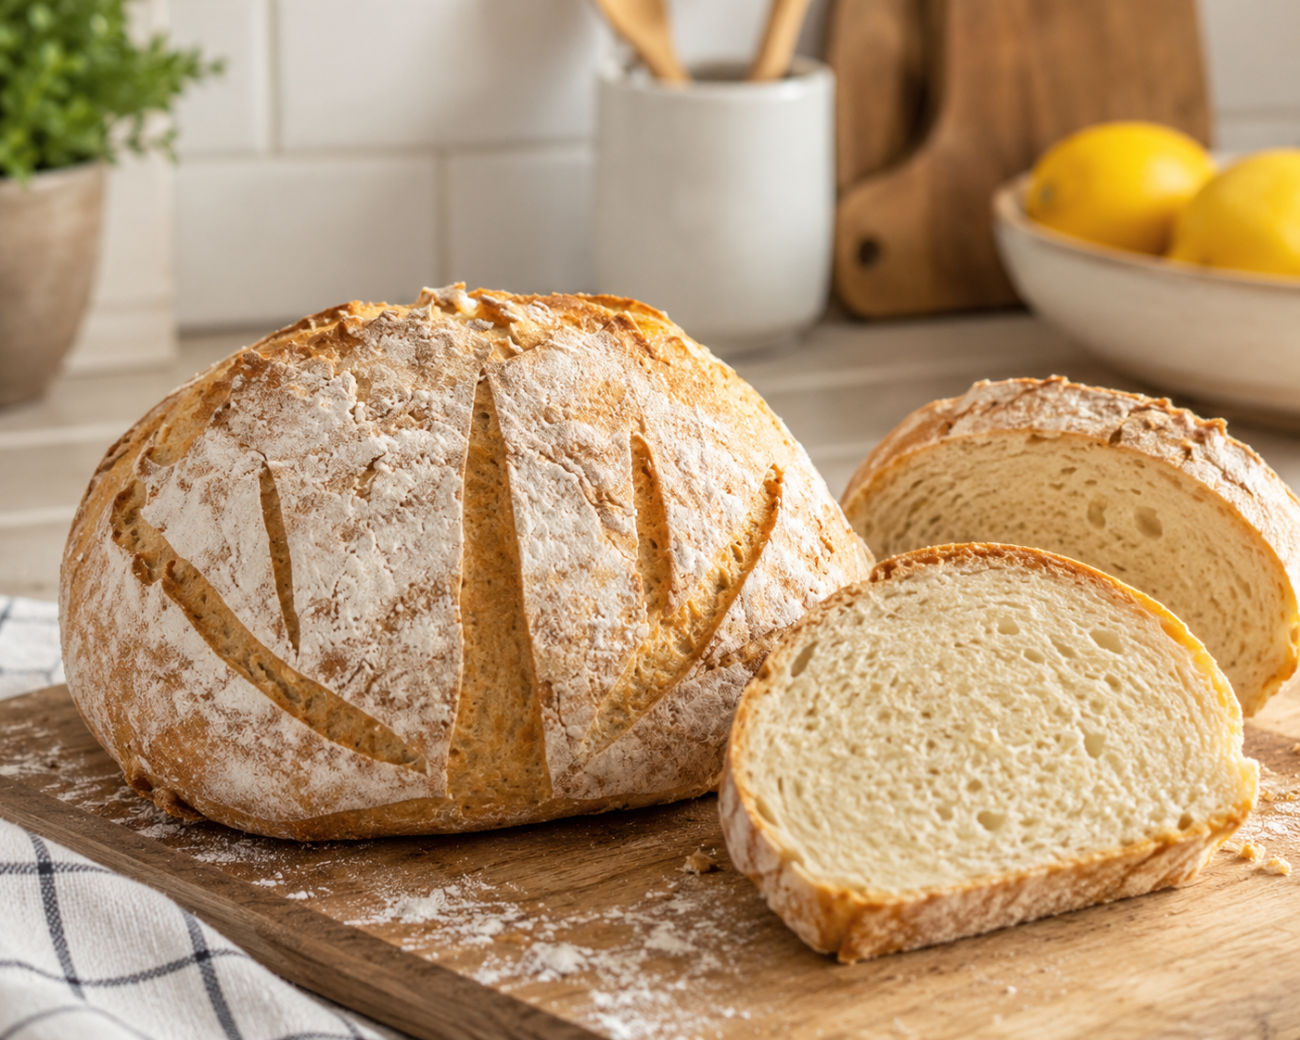
Freshly baked gluten-free bread is easier to make than it may seem. This no knead gluten free bread uses a few simple ingredients and doesn’t require a stand mixer or kneading. After mixing the dough, it simply rests for several hours before baking. The finished loaf has a lightly crisp crust with a soft center, making it a great choice for toast, sandwiches, or serving with soup.
Why This Recipe Stands Out
Many gluten-free bread recipes involve extra mixing, special equipment, or several rising stages. This recipe keeps things simple. Once the ingredients are mixed, the dough is left to rest while the yeast develops its structure naturally.
Although the waiting time is longer than the preparation time, the actual work takes only a few minutes. The result is a homemade loaf that is easy to slice and works well for everyday meals.
Ingredients
Gather these ingredients before you begin.
- Gluten-free flour
- Active dry yeast
- Warm water
- Sugar
- Salt
Using fresh ingredients and measuring them carefully helps produce consistent results every time.
Before You Start
Taking a few minutes to prepare everything first will make the process much easier.
Use warm water instead of hot water. If the water is too hot, the yeast may not activate properly. If it’s too cold, the dough will take much longer to rise.
Before adding the yeast to the flour, check that it’s active. Mix it with the warm water and sugar, then leave it for about five minutes. A foamy layer on top means it’s ready to use.
Keep in mind that gluten-free dough looks different from regular bread dough. It stays thick and sticky throughout the process, so don’t expect a smooth or stretchy texture.
Step By Step Instructions
Activate the Yeast
Pour the warm water into a bowl, then stir in the sugar until it dissolves.
Add the active dry yeast and mix gently.
Leave the bowl undisturbed for about five minutes. Once the mixture becomes foamy, the yeast is active and ready to use.
Mix the Dry Ingredients
Place the gluten-free flour and salt into a large mixing bowl.
Stir them together until the salt is evenly distributed. This helps create a more consistent dough after the wet ingredients are added.
Prepare the Dough
Pour the activated yeast mixture into the bowl of dry ingredients.
Mix everything together with a sturdy spoon or spatula until no dry flour remains.
The dough should be thick and sticky. It won’t become smooth like traditional bread dough, and that’s completely normal.
If the dough feels too dry, add a little warm water.
If it becomes too wet, sprinkle in a small amount of gluten-free flour and mix again until it reaches a thick consistency.
Let the Dough Rest
Cover the bowl with plastic wrap, a lid, or a clean kitchen towel.
Leave it at room temperature for about 5 hours.
During this time, the yeast slowly creates air pockets inside the dough, helping the bread develop a lighter texture while it bakes.
If your kitchen is warm, the dough may rise faster. Once it has doubled in size, it’s ready for the next step.
Shape the Loaf
Lightly dust your work surface with gluten-free flour.
Transfer the risen dough onto the floured surface and gently shape it into an oval loaf. Avoid pressing the dough too firmly, as this can remove some of the air trapped inside.
Line a baking dish with parchment paper and place the shaped loaf inside.
Cover the dish with its lid. If you don’t have a lid, use a double layer of aluminum foil before placing it in the oven.
Dough Consistency
If you’re making this recipe for the first time, checking the dough before baking can help avoid common problems.
The dough should be:
- Thick and sticky
- Easy to stir with a spoon
- Soft but able to hold its shape
- Neither dry nor runny
Once the dough looks like this, it’s ready to rest before baking.
Baking the Bread
Preheat your oven to 450°F (230°C).
Place the covered baking dish in the preheated oven and bake for 40 minutes. Keeping the bread covered during the first stage helps the loaf cook evenly while trapping moisture inside.
After 40 minutes, carefully remove the lid or aluminum foil. Return the bread to the oven and continue baking for 20 to 30 minutes, or until the crust becomes lightly golden.
Every oven heats a little differently, so keep an eye on the bread during the last few minutes of baking. If the crust reaches your preferred color earlier, you can remove it from the oven.
Let the Bread Cool
Transfer the bread to a cooling rack as soon as it comes out of the oven.
Allow it to cool for 5 to 10 minutes before slicing.
Cutting into the loaf too early can make the inside feel sticky because the bread is still finishing its cooking process. Waiting a few extra minutes helps the slices hold their shape much better.
Simple Ways to Customize the Bread
This recipe is easy to adjust if you’d like to add a little extra flavor.
Some popular options include:
- Garlic powder
- Onion powder
- Dried rosemary
- Dried thyme
- Sesame seeds
- Poppy seeds
- Chopped walnuts
- Sunflower seeds
Mix herbs or seasonings into the dough before the resting time. Seeds and chopped nuts can also be sprinkled over the top before baking for extra texture.
Using a Dutch Oven
If you’re baking the bread in a Dutch oven, preheat it along with the oven.
Once the dough has finished rising, shape it into a loaf and carefully place it into the hot Dutch oven using parchment paper.
Bake with the lid on for 30 minutes.
Remove the lid and continue baking for another 15 to 20 minutes, or until the crust turns golden.
The Dutch oven helps create a crisp crust while keeping the inside soft.
How to Store the Bread
After the bread has cooled completely, place it in an airtight container or wrap it tightly.
It can be stored at room temperature for up to 2 days.
For longer storage, keep it in the refrigerator, where it stays fresh for several more days.
Always allow the bread to cool before storing it to prevent excess moisture from building up inside the container.
Can You Freeze It?
Yes.
Slice the bread before freezing so you can remove only the pieces you need later.
Place the slices in a freezer-safe bag or container, removing as much air as possible before sealing.
When ready to use, thaw the slices at room temperature or warm them in a toaster.
Serving Ideas
This bread pairs well with many everyday meals.
Try serving it with:
- Soup
- Stew
- Fresh salad
- Scrambled eggs
- Butter
- Cream cheese
- Sandwich fillings
- Avocado spread
It also makes a good choice for breakfast when lightly toasted.
Frequently Asked Questions
Can I use another gluten-free flour?
Yes, although different flour blends absorb water differently. If you choose another brand, you may need to make small adjustments to the amount of flour or water until the dough reaches a thick, sticky consistency.
Why didn’t my dough rise?
Inactive yeast is one of the most common reasons. Always test the yeast in warm water with sugar before mixing the dough. If it doesn’t become foamy after a few minutes, replace it with fresh yeast.
How long should the dough rest?
Around 5 hours is usually enough at room temperature. In warmer weather, the dough may rise sooner, while cooler kitchens may require a little more time.
Why is my dough too wet?
Different gluten-free flour blends absorb moisture differently.
If the dough looks too loose, add a little extra flour until it becomes thick enough to hold its shape.
Why is my dough too dry?
Mix in warm water a small amount at a time until the dough becomes soft and sticky.
Avoid adding too much water at once because it can quickly become difficult to correct.
Can I use instant yeast?
Yes. Instant yeast can be used, although the texture and rising time may vary slightly depending on the brand.
Can I leave the dough overnight?
Yes. If your kitchen is cool, the dough can rest overnight at room temperature. If the room is warm, check the dough earlier to prevent it from rising too much.
